Are you looking to create a stunning website but don’t have any coding skills? Don’t worry, with a drag-and-drop page builder, you can design a website without writing a single line of code. In this article, we will guide you through the process of creating a WordPress website using a drag-and-drop page builder.
Introduction
WordPress is a popular content management system that powers more than 30% of all websites on the internet. It is an open-source platform that allows users to create and manage their websites easily. However, creating a website from scratch can be a daunting task, especially for beginners who don’t have any coding experience.
A drag-and-drop page builder simplifies the website creation process by allowing users to design pages by dragging and dropping elements onto a canvas. It eliminates the need for coding and makes website creation accessible to everyone.
Step 1: Choose a Hosting Plan
Before you start building your website, you need to choose a hosting plan. A hosting plan is a service that allows you to store your website files on a server and make them accessible to the internet. There are many hosting providers to choose from, but we recommend using a reliable and affordable provider like Bluehost or SiteGround.
Step 2: Install WordPress
Once you have chosen your hosting provider, the next step is to install WordPress. Most hosting providers offer a one-click installation option that makes it easy to install WordPress. Follow the instructions provided by your hosting provider to install WordPress.
Step 3: Choose a Drag-and-Drop Page Builder Plugin
There are many drag-and-drop page builder plugins available for WordPress. Some popular options include Elementor, Divi, and Beaver Builder. We recommend using Elementor because it is easy to use and has a wide range of features.
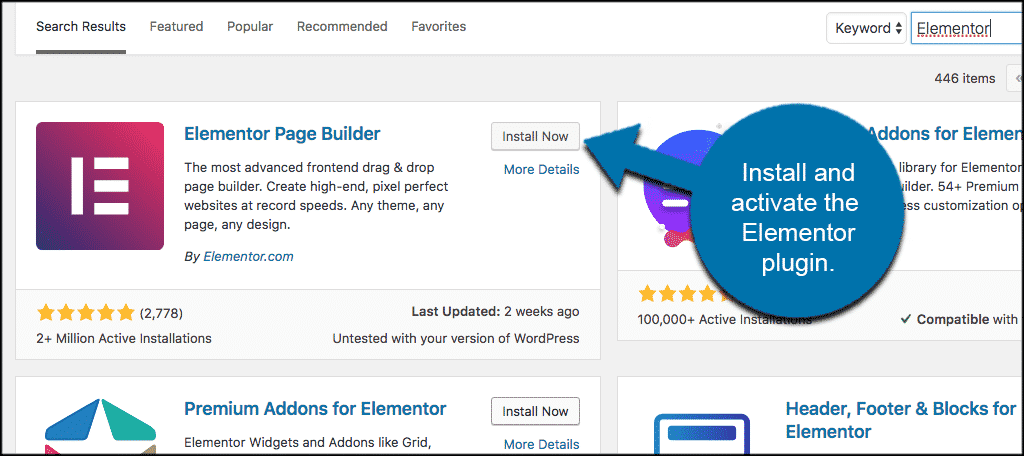
To install Elementor, go to the WordPress dashboard and click on “Plugins” in the menu. Click on “Add New” and search for “Elementor.” Click on “Install Now” and then “Activate” to activate the plugin.
Step 4: Design Your Website
Now that you have installed Elementor, it’s time to start designing your website. To create a new page, go to the WordPress dashboard and click on “Pages” in the menu. Click on “Add New” to create a new page.
Once you have created a new page, click on “Edit with Elementor” to open the Elementor editor. You will see a canvas where you can drag and drop elements to design your page.
Elementor has many pre-designed templates that you can use to get started. You can also customize the templates or create your own design from scratch. To add an element to your page, simply drag it from the left panel and drop it onto the canvas.
Step 5: Publish Your Website
Once you have designed your website, it’s time to publish it. Click on the “Publish” button to make your website live. Your website is now accessible to the internet, and you can share the link with your audience.
Conclusion
Creating a WordPress website with a drag-and-drop page builder is easy and accessible to everyone. With Elementor, you can design a stunning website without any coding skills. Follow the steps outlined in this article to create your website and share it with the world. Happy designing!